How To Use Hexo
Introduction
The combination of Hexo + GithubPages is an easier way to configure your own blog. Welcome to Hexo! This is your very first post. Check documentation for more info. If you get any problems when using Hexo, you can find the answer in troubleshooting or you can ask me on GitHub.
Steps
Create a GitHub Repo
You should create a repo for your blog, and the repo name must be <username>.github.io.
Init Hexo
Then, navigate to <username>.github.io directory, run the following command to init Hexo blog.
1 | # cd <username>.github.io |
Install Dependencies
Finally, run the following command to finalize installing procedures.
1 | npm install |
Hexo Useful Commands
Create a new post
Enter <username>.github.io directory, and execute the following command for new page creation. If you haven’t specify layout, hexo will use the default layout for new page creation. The default layout is configured in _config.yml file, the keyword is default_layout. For more info, please
see chapter Writing.
1 | # hexo new [layout] <title> |
Run server
If you want to preview your blog on your local machine, you can use following command to deploy your blog on your local machine. For more info, please see chapter Server.
1 | $ hexo server |
Generate static files
Before you publish your blog to github pages, you should generate static files locally. If you use the github pages’s theme, you only need to configure wanted theme in your _config.yml file, and github will gengerate all static files before deploying. For more info, please see chapter Generating.
1 | $ hexo generate |
Deploy to Remote Sites
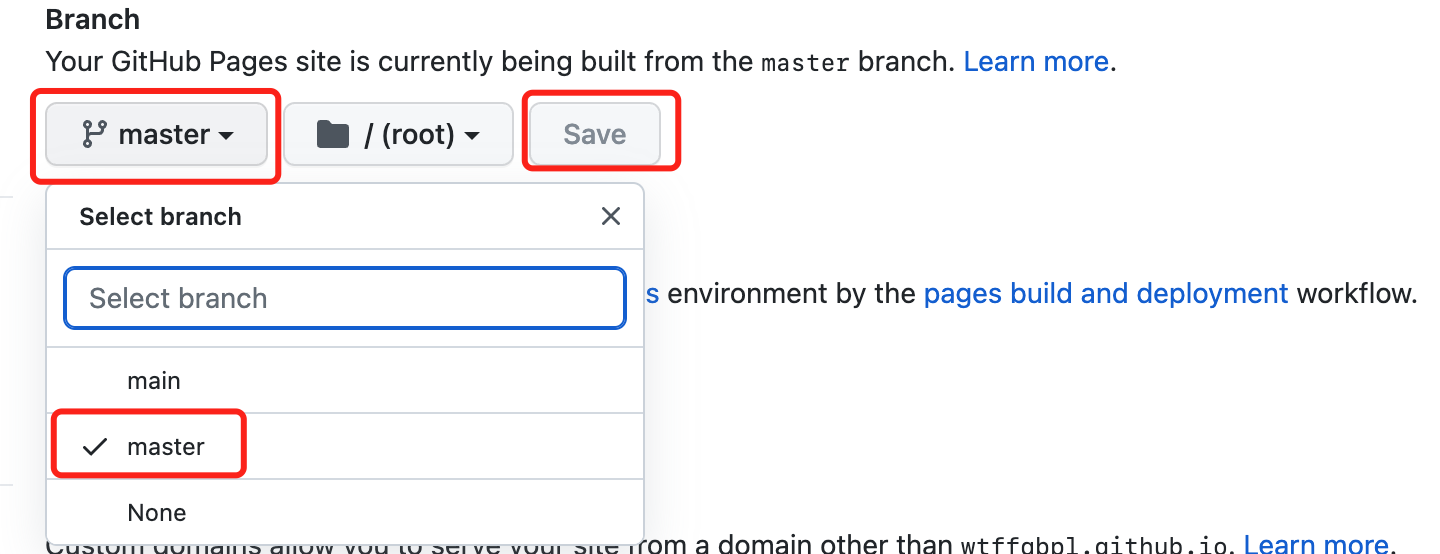
After generating all static files, you can deploy your blog on GitHub pages. This command would create a master branch in your blog repo. So your github pages should be based on master branch. You can change the github pages’ branch in Settings->Pages->Branch.

1 | $ hexo deploy |
For more info, please see chapter Deployment.
Themes
Install Theme
I’d like to use hexo-theme-icarus theme. User should execute the following commands to configure icarus theme.
1 | npm install hexo-theme-icarus |
Hexo provides numerous themes, please see Hexo-Themes for more details.
Change Your Personnel Info
User should change the personnel info in _config.icarus.yml file.
Notes
All blog data are listed in source/ directory. My source directory hierarchy is as follows:
1 | » tree source |
If you want to change the default logo logo.svg, you should put your own logo.svg in source/img/logo.svg. Besides, Mac user can use imagemagick tool for png to svg conversion. For more details, you can see imagemagick-homepage. After install imagemagick tool, you can execute the following commands to convert.
1 | convert logo.png logo.svg |
Add “Read More” tag for your posts
There are two ways to add this tag.
- First, you can add
excerpttag in your post, and add some introductions for posts.
1 | title: New Article |
- add
<!-- more -->line after introductions in your posts.
References
How To Use Hexo


